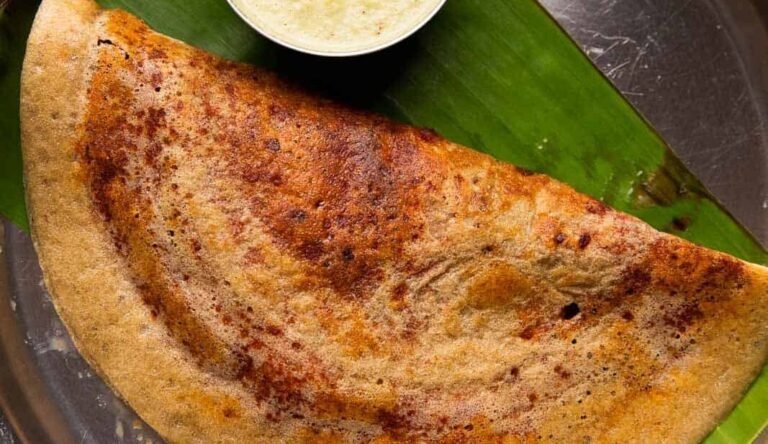
Indian cuisine boasts a diverse range of flavors, and dosa is a favorite among many. This thin, crispy, and delectable crepe, made from fermented rice and urad dal (black gram) batter, is a staple breakfast or snack in many Indian households. However, making traditional dosa batter from scratch can be time-consuming and requires careful fermentation. But fear not, there’s a quicker and easier way to enjoy dosa without the hassle of fermenting batter: using dosa mix. In this article, we will explore how to make crispy millets dosa with dosa mix, a convenient and wholesome alternative.
The Rise of Dosa Mix
Dosa mix has gained popularity in recent years due to its convenience and time-saving qualities. It’s an excellent solution for those craving dosa but lacking the patience for the traditional batter-making process. Dosa mix typically contains a combination of rice flour, urad dal flour, and other ingredients like salt and fenugreek seeds. Additionally, some variants include various millets, such as foxtail millet, barnyard millet, or finger millet, which add a healthy twist to the classic dosa.
Millet-based dosa mix has quickly become a favorite among health-conscious individuals because millets are known for their nutritional value. Millets are rich in fiber, protein, and various essential nutrients. They are also gluten-free, making them a great choice for those with gluten sensitivity or celiac disease. The addition of millets to dosa mix not only enhances the flavor but also elevates its health benefits.
Preparing Crispy Millets Dosa
Now, let’s get to the exciting part: making crispy millets dosa using dosa mix. Here’s a step-by-step guide to help you create a delicious and wholesome breakfast or snack:
Instructions:
- Mixing the Dosa Batter:
- In a mixing bowl, take the desired quantity of millet-based dosa mix.
- Gradually add water to the mix and whisk it to form a smooth, lump-free batter. The consistency of the batter should be similar to that of traditional dosa batter, thin enough to spread easily but not too runny.
- Adding Salt:
- Mix in salt to taste and stir well. Adding salt at this stage ensures it’s evenly distributed throughout the batter.
- Resting Period:
- Let the batter rest for about 15-20 minutes. This resting period allows the batter to hydrate and helps achieve a better texture when cooking the dosas.
- Heating the Griddle:
- Place a non-stick dosa tava (griddle) or a flat-bottomed skillet on medium heat. Once it’s hot, reduce the flame to low.
- Greasing the Griddle:
- Drizzle a few drops of oil or ghee onto the griddle. Spread it evenly using a paper towel or a piece of cut potato. This greasing step prevents the dosa from sticking and imparts a lovely crispiness.
- Pouring the Batter:
- Take a ladleful of the dosa batter and pour it onto the center of the griddle. Using the back of the ladle, gently spread the batter in a circular motion to create a thin, even layer. The circular motion helps achieve the characteristic round shape of dosa.
- Cooking the Dosa:
- Cook the dosa on low heat until the edges start to turn golden brown and crisp. You can cover the dosa with a lid to ensure it cooks evenly. It usually takes a couple of minutes for the dosa to cook.
- Flipping the Dosa:
- Once the edges are crispy and the dosa lifts easily from the griddle, carefully flip it over using a spatula. Let it cook for another minute or so until both sides are golden and crispy.
- Removing the Dosa:
- Gently lift the dosa from the griddle and place it on a plate. Your crispy millets dosa is ready to be served!
Ingredients:
- Dosa mix (millet-based)
- Water
- Oil or ghee for cooking
- Salt to taste
Crispy millets dosa can be served with a variety of accompaniments to enhance its flavor. Here are some popular options:
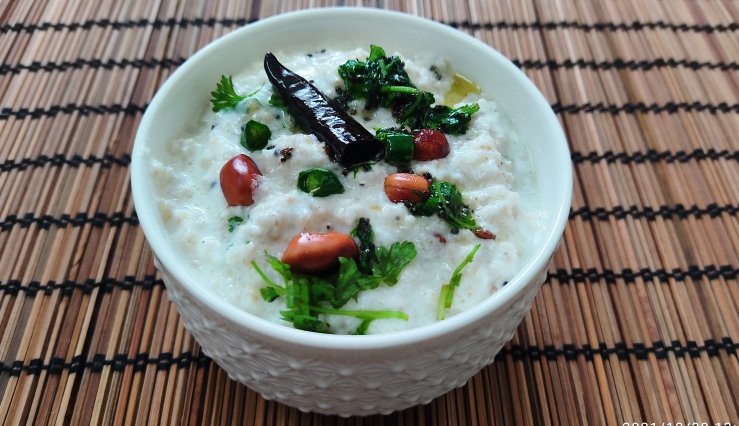
- Coconut Chutney: Freshly grated coconut, green chilies, and a few simple spices blended into a fine paste make for a delightful side dish.
- Sambar: A traditional South Indian lentil-based stew with vegetables, spiced with sambar powder and tamarind extract, adds depth and complexity to the meal.
- Tomato Chutney: A tangy and spicy tomato chutney made with tomatoes, red chilies, and a touch of garlic complements the dosa beautifully.
- Mint Chutney: A refreshing mint and coriander chutney with a hint of yogurt and spices cools the palate.
- Potato Masala: A flavorful and spicy potato filling can be placed inside the dosa to create a “masala dosa.” This variation is a complete meal on its own.
- Pickles: A variety of Indian pickles, such as mango or lemon pickle, can add an extra zing to your dosa.
Benefits of Using Dosa Mix
Using dosa mix, especially millet-based variants, offers several benefits:
- Time-saving: Dosa mix significantly reduces the time and effort required to prepare dosas. You can have a quick and healthy meal in no time.
- Nutritional Value: Millets are rich in nutrients and dietary fiber. By using a millet-based dosa mix, you can increase the nutritional value of your dosas.
- Gluten-free Option: For those with gluten sensitivities or celiac disease, millet-based dosa mix is an ideal gluten-free alternative.
- Consistency: Dosa mix ensures a consistent dosa batter, eliminating the need for precise measurements and time-consuming fermentation.
- Variety: Dosa mix comes in various flavors and combinations, allowing you to explore and enjoy a wide range of dosa variations.
Conclusion
Crispy millets dosa made with dosa mix is a convenient, nutritious, and delicious alternative to traditional dosa batter. It’s perfect for those busy mornings when you crave a quick, yet healthy, breakfast option. Additionally, the incorporation of millets enhances the nutritional profile of your dosas, making them an excellent choice for those seeking a balanced diet.
Whether you serve it with coconut chutney, sambar, or your favorite side dish, millets dosa prepared with dosa mix is sure to satisfy your taste buds while saving you time in the kitchen.